Getting started
Prerequisites
- A D365FO development environment (cloud-hosted or local VHD).
- Access to the TrudAX/XppTools GitHub repository — the framework is free and open source, no licence keys required.
The models
The framework consists of the following models, located in the DEVTutorial folder of the repository:
| Model | Install | Purpose |
|---|---|---|
DEVCommon | Yes | Shared helpers (file readers, dimension helpers). |
DEVExternalIntegration | Yes | The External Integration framework itself. |
DEVExternalIntegrationSamples | No — reference only | Tutorial implementations used by the step-by-step guides. Use it as a code reference or in a throwaway dev environment; do not include it in a client database. |
Installation
Download the source code from the GitHub repository into the Temp directory on the DEV VM.
For External integration, the recommended approach is to create submodels in your main project model:
-
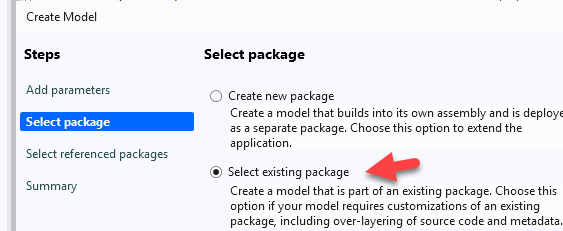
In Visual Studio, go to Dynamics 365 → Model Management → Create model.
-
Create 2 models, DEVCommon and DEVExternalIntegration, for your main project package.
-
Copy all content from the downloaded models. The project structure should look like this:

-
Build the models and synchronize the database. After the build, a new External integration module appears in the D365FO navigation pane, with Setup, Inquiries, and Periodic sections.
If you want to rename the DEV element prefix to your own, use a bulk file renaming tool (e.g. Bulk Rename Utility) on the XML files, followed by Replace in files in Notepad++.
Run a first test import
The fastest way to see the framework working is the ledger journal tutorial, which needs no external connector. It uses the DEVIntegTutorialImportLedgerJournal class from the Samples model — copy that class (or the whole Samples model, in a dev environment only) to follow along:
- Open External integration → Setup → Connection types and create a Manual connection (no credentials needed).
- Open External integration → Setup → Inbound message types, create a message type with the processing class
DEVIntegTutorialImportLedgerJournal, and set its operation parameters (journal name, file type). - Use the Import file button to upload one of the test files provided in the repository (prepared for the standard Contoso demo data).
- Check the result in Incoming messages: the message should reach the Processed status with a link to the created journal, staging data, and processing statistics.
The full walk-through, including error-handling scenarios, is in the tutorial: How to implement file-based integration in D365FO using X++.
Every inbound message type has an Import file button and a Manual load function — you can develop and test any integration end-to-end in a dev environment without access to the real external system. See Operations forms.
Next steps
- Read the forms reference to understand the setup options.
- Pick the connector and message type closest to your scenario and follow its tutorial.
- Review the integration design checklist before designing a production interface.